
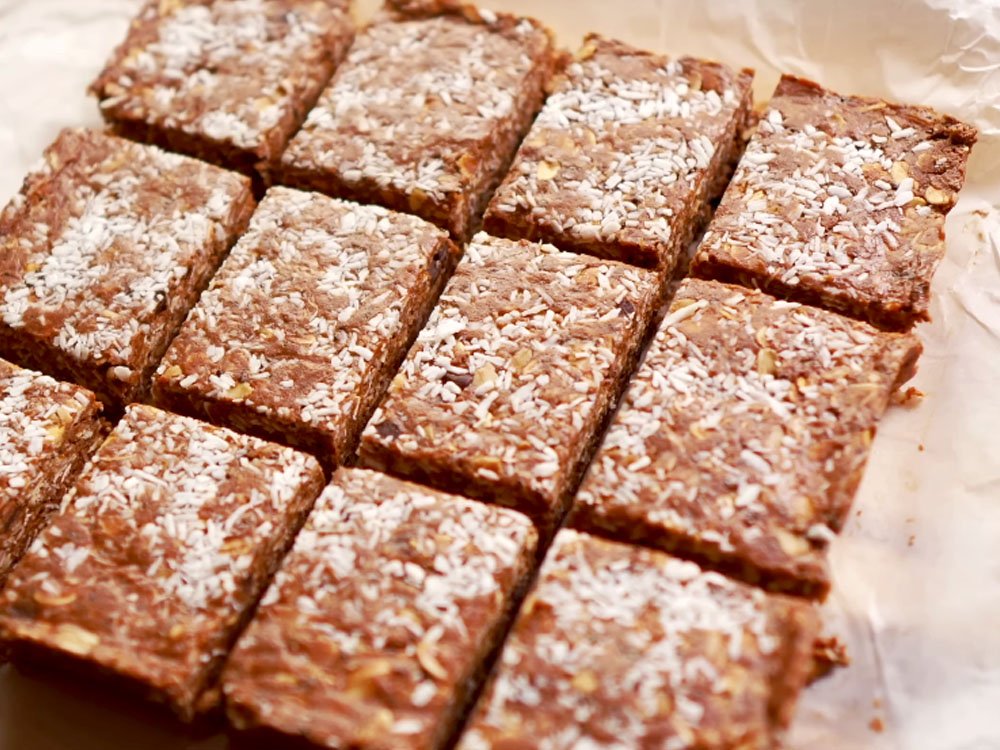
Healthy snack bars usually taste like cardboard, but this old fashioned oatmeal bars recipe actually tastes like a cozy morning treat.
Busy afternoons call for a quick snack, and store-bought granola bars always leave your kids asking for more sweets. Baking a batch of chewy oat squares at home changes that snack routine, giving your kitchen the warm smell of toasted butter and brown sugar.
Sticking around for a few minutes will show you the exact bake time and mixing tricks you need to keep these squares soft in the center with a crisp, golden crust on top.
Why You Will Love This Recipe
- Pantry Friendly: Basic baking staples build this snack, meaning you rarely need a special grocery trip to get started. Rolled oats and flour sit in most pantries, making this recipe a go-to choice when your snack shelf looks empty on a busy Tuesday afternoon.
- Naturally Chewy: Brown sugar and melted butter team up to create a dense, satisfying texture that rivals any bakery treat. Each square holds its shape in lunchboxes without crumbling into dust, so your kids can eat them on the go without making a massive mess.
- Customizable Base: Plain oat squares act as a blank canvas for chocolate chips, dried fruit, or a swirl of peanut butter. You can adapt the filling to fit whatever ingredients happen to linger in your pantry, keeping snack time fresh and interesting for the whole family.
- One Bowl Cleanup: Mixing wet and dry ingredients in a single bowl keeps your kitchen sink clear of extra pots and pans. Less time spent washing dishes means you can relax with a warm square and a cup of coffee while the kids finish their homework.
- Budget Friendly: Whole grains cost a fraction of pre-packaged snack bars, saving your grocery budget without sacrificing flavor or quality. Baking from scratch lets you control every single ingredient, cutting out mysterious preservatives while keeping your family well-fed and happy all week long.
Ingredients
- Rolled Oats (2 cups): Forms the hearty foundation of every square, providing a chewy texture and wholesome grain flavor. Stick to old-fashioned rolled oats instead of instant varieties, because quick oats turn mushy and ruin the rustic structure you want in a good bar.
- All-Purpose Flour (1 cup): Binds the oat mixture together so your squares do not fall apart the second you pick them up. Sifting the flour with a pinch of salt ensures even distribution, preventing any heavy pockets in the finished pan.
- Brown Sugar (1 cup): Adds deep molasses flavor and creates that signature caramel-like chewiness in every bite. Dark brown sugar works best here, bringing a richer note, but light brown sugar functions just fine if that is what you have on hand.
- Unsalted Butter (1 cup): Melts down to coat every oat grain, providing rich flavor and helping the edges turn golden and crisp. Use unsalted butter so you can control the salt level yourself, and make sure it cools slightly before mixing so you do not cook the eggs.
- Large Eggs (2): Acts as the primary binder, holding the crumb together and adding richness to the bake. Whisking them slightly before adding them to the bowl helps them blend smoothly into the buttery oat mixture without leaving sticky spots.
- Baking Soda (1 teaspoon): Gives the bars a tiny lift so they stay tender instead of turning into dense bricks. Check the expiration date on your box before starting, because old baking soda fails to rise and leaves your bake heavy.
Steps to Make Old Fashioned Oatmeal Bars Recipe (Quick and Easy Guide)
Preheating Your Oven
Hot ovens ensure your oatmeal squares bake evenly from edge to center without drying out on top. Set your dial to 350 degrees Fahrenheit, and let the heating element fully warm up while you gather your mixing bowls. Lining your baking pan with parchment paper leaves a handy overhang, letting you lift the whole cooled slab out easily later.
Mixing Dry Ingredients
Large mixing bowls hold your base ingredients safely without spilling flour over the counter as you stir. Dump your rolled oats, all-purpose flour, brown sugar, baking soda, and a pinch of salt into the bowl together. Toss everything around with a wooden spoon until the brown sugar lumps break apart completely and the oat mixture looks uniform in color.
Combining Wet Elements
Melted butter brings richness to the dry mix, so let it cool for a few minutes so it does not scramble your eggs. Pour the warm butter, eggs, and a splash of vanilla extract right into the center of your dry oat mixture. Stir the ingredients gently until a thick, sticky dough forms and no dry patches of flour remain hiding at the bottom of the bowl.
Baking Until Golden
Press half of your sticky oat mixture firmly into the bottom of your prepared baking pan to create a solid crust. Pour in your favorite jam or chocolate chips, then drop the remaining oat dough in small clumps across the top. Slide the pan into your hot oven for about 25 minutes, watching for the edges to turn a deep golden brown and the kitchen to fill with a sweet, buttery aroma.
What to Serve with Old Fashioned Oatmeal Bars Recipe
Morning Coffee Pairings
Hot coffee cuts through the rich sweetness of a dense oat bar, balancing the flavors on your palate. Pour yourself a dark roast or a simple latte, and let the warm drink soften the chewy edges of your morning snack.
Afternoon Tea Selection
Herbal tea makes a calming companion for a mid-afternoon snack break when you need a quiet moment to yourself. Chamomile or green tea highlights the nutty flavor of the baked oats without overpowering the brown sugar sweetness.
Fresh Fruit Sides
Sliced tart apples or fresh berries add a juicy contrast to the heavy, buttery texture of the oat squares. The bright acidity of fresh fruit cuts through the rich sugar, making your afternoon snack feel a bit more balanced and refreshing.
Ice Cream Toppings
Crumbled warm oatmeal squares taste incredible tossed over a scoop of cold vanilla ice cream for a quick dessert. The temperature contrast between the warm oats and the melting ice cream creates an easy weeknight treat that feels surprisingly fancy.
Storage and Reheating
Countertop Storage Containers
A tight lid keeps your baked squares from drying out on the kitchen counter over the next few days. Line an airtight plastic container with paper towels to catch any stray moisture, and arrange your cut bars in a single flat layer inside.
Room Temperature Lifespan
Freshly baked oat bars stay soft and chewy for up to four days when stored away from direct sunlight. Keep the container in a cool pantry spot, because warm kitchen air makes the butter soften too much and changes the pleasant crumb texture.
Quick Microwave Warmth
Cold squares straight from the container lose some of their fresh-baked charm until you give them a quick blast of heat. Pop a single square onto a small plate, and microwave it for ten seconds to revive that gooey, buttery center.
Freezer Storage Options
Long-term storage works wonderfully if you want to bake a double batch on the weekend for busy school mornings. Wrap individual squares tightly in plastic wrap, drop them into a freezer bag, and store them for up to three months without losing flavor.
What Makes This Recipe Special
Rustic Texture Contrast
Crispy golden edges give way to a soft, tender middle that keeps you coming back for just one more bite. Most store-bought bars taste uniform and rubbery, but home baking lets you achieve that wonderful contrast between a crunchy top and a chewy core.
Real Pantry Ingredients
Simple whole foods replace the weird chemical preservatives found in commercial snack bars, giving you complete peace of mind. You can read every single item on the ingredient list, which makes feeding these wholesome treats to your hungry family feel genuinely rewarding.
Flexible Jam Layers
A hidden ribbon of fruit jam through the middle adds a tart surprise that cuts the heavy sweetness of the oats. This technique mimics classic bakery bars, transforming a basic breakfast staple into something that feels special enough for afternoon company.
Foolproof Mixing Method
One-bowl preparation removes the intimidating steps usually associated with baking from scratch on a busy weeknight. You do not need fancy kitchen gadgets or standing mixers, just a trusty wooden spoon and a willingness to get your hands a little sticky.
Pro Tips for the Best Results
Packing the Crust Firmly
Pressing the bottom oat layer firmly into your baking pan prevents your squares from crumbling apart when you slice them later. Use the flat bottom of a measuring cup to tamp the sticky dough down evenly, making sure it reaches every single corner of the dish.
Cooling Completely Before Slicing
Hot oatmeal bars fall apart easily if you try to cut them right out of the oven while the butter is still melted. Let the pan sit on a wire rack for at least thirty minutes so the sugars can firm up and give you clean, sharp edges.
Choosing Rolled Oats
Old-fashioned rolled oats provide the ideal chewy structure that instant oats simply cannot match in a baked bar recipe. Instant oats break down into a mushy paste, so stick with the thick flakes to get that satisfying, rustic texture in every bite.
Lining Your Pan
Parchment paper acts as your best friend when removing sticky baked goods from a metal or glass baking dish. Leave an overhang on two sides so you can lift the entire cooled slab out onto a cutting board without leaving half your snack stuck to the bottom.
Variations and Substitutions
Swapping Butter for Coconut Oil
Melted coconut oil replaces butter seamlessly if you want to give your oat bars a subtle tropical flavor twist. Keep in mind that coconut oil makes the finished squares slightly more crumbly, so let them cool completely before attempting to slice them.
Adding Chocolate Chips
Swap the fruit jam layer for a cup of semi-sweet chocolate chips if your kids prefer a sweeter treat after school. The chocolate melts slightly while baking, creating pockets of rich cocoa that pair wonderfully with the nutty oat base.
Using Maple Syrup
Replace half of the brown sugar with pure maple syrup to add a deeper, woodsy sweetness to the overall flavor profile. Reduce the melted butter by one tablespoon if you make this swap, because liquid sweeteners add extra moisture to your dough.
Mixing in Nuts
Toss a half cup of chopped walnuts or pecans into the dry oat mixture for an extra layer of nutty crunch. Toasted nuts elevate the rustic flavor of the oats, making your everyday snack bars taste like a gourmet bakery item.
Frequently Asked Questions
Can I Use Quick Oats Instead of Rolled Oats?
Quick oats absorb liquid much faster than rolled oats, which makes your baked bars turn out mushy and dense. Stick to old-fashioned rolled oats for the best chewy texture and rustic flavor.
Is Freezing These Oatmeal Bars a Good Idea?
Freezing works wonderfully for long-term storage when you want to prep snacks ahead for busy weeks. Wrap individual squares tightly in plastic wrap, and store them in a freezer bag for up to three months.
Are These Bars Gluten-free?
Standard rolled oats often cross-contaminate with wheat during processing, so you must buy certified gluten-free oats. Check your flour package as well, substituting a standard gluten-free flour blend if needed for dietary reasons.
Do I Need to Grease the Baking Pan?
Lining your baking pan with parchment paper prevents sticking much better than cooking spray or butter alone. The paper overhang also lets you lift the entire cooled slab out for easy slicing.
Can I Make This Recipe Without Eggs?
Applesauce works as a standard egg substitute in many baked goods, but it changes the moisture level significantly. Use a commercial egg replacer if you need to keep the chewy texture intact without using real eggs.
Does Brown Sugar Make a Big Difference?
Brown sugar adds necessary moisture and molasses flavor that white sugar simply cannot replicate in baked goods. Light brown sugar works in a pinch, but dark brown sugar gives you a richer, more caramel-like taste.
Can I Add Peanut Butter to the Mix?
Swapping half a cup of the butter for creamy peanut butter adds a nutty flavor that kids love. Just make sure you use regular stirred peanut butter rather than natural oil-heavy varieties that separate easily.
How Long Do These Bars Last on the Counter?
Freshly baked squares stay soft and chewy for up to four days in a sealed airtight container. Keep them at room temperature away from direct sunlight to preserve that wonderful, buttery texture.
Final Thoughts
Baking a fresh batch of these old fashioned oatmeal bars fills your kitchen with the best comforting aromas. You will love how easily they come together on a busy afternoon, giving your family a wholesome treat that actually tastes amazing.
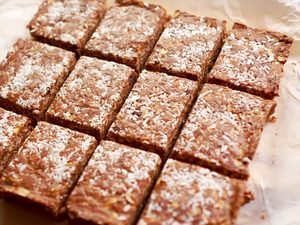
Old Fashioned Oatmeal Bars Recipe
Ingredients
- Rolled oats (2 cups)
- All-purpose flour (1 cup)
- Brown sugar (1 cup)
- Unsalted butter (1 cup)
- Large eggs (2)
- Baking soda (1 teaspoon)
Tools You Need
- Large mixing bowl
- Wooden spoon
- 8×8 inch baking pan
- Parchment paper
- Measuring cups
Steps
- Preheat your oven to 350 degrees Fahrenheit and line an 8×8 inch pan with parchment paper.
- Mix the rolled oats, flour, brown sugar, baking soda, and salt together in a large bowl.
- Pour in the cooled melted butter, eggs, and vanilla extract.
- Stir the mixture gently until a thick, sticky dough forms without dry flour pockets.
- Press half of the oat dough firmly into the bottom of your prepared baking pan.
- Layer your favorite jam or chocolate chips evenly over the pressed base layer.
- Drop the remaining oat dough in small clumps across the top of the filling.
- Bake for 25 minutes until the edges turn golden brown and the center looks set.