
This simple banana pudding with instant pudding is a classic dessert that hits the spot when you need something sweet in a hurry. You might remember digging into a bowl of this at summer cookouts or quiet family gatherings where the goal was to keep everyone happy with minimal fuss.
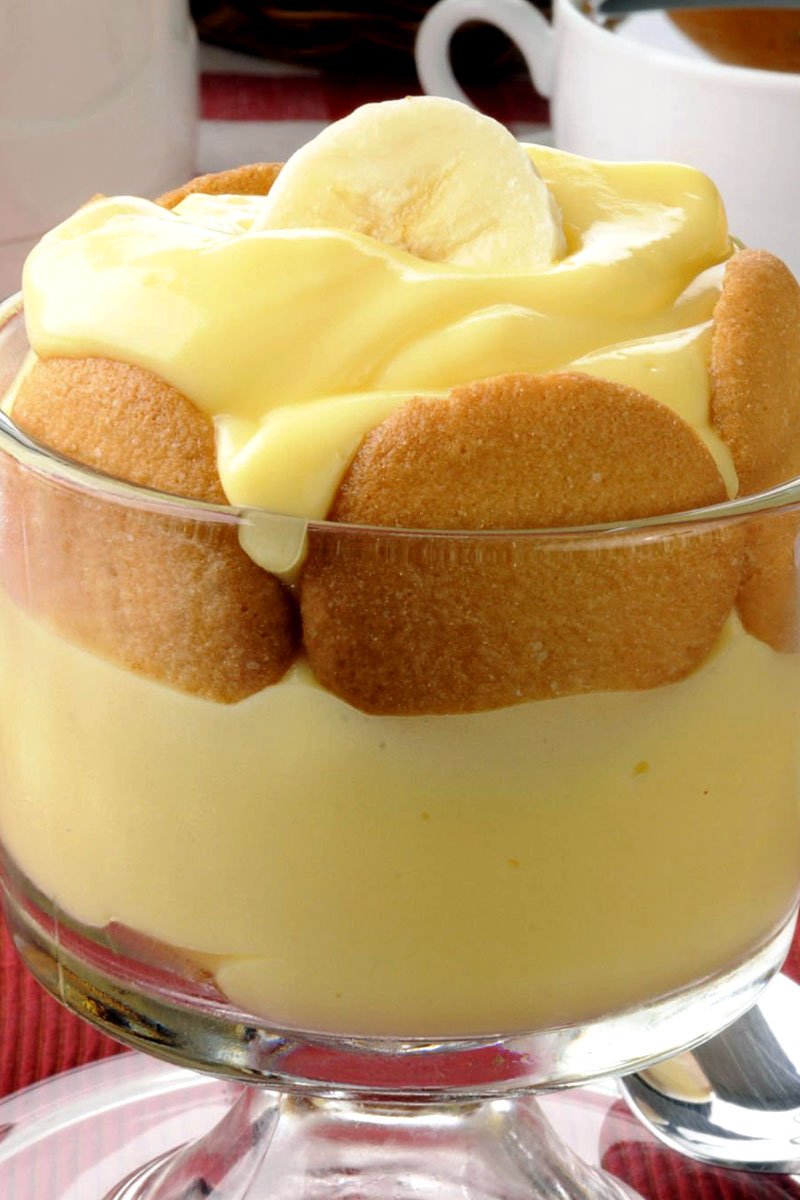
Ripe yellow fruit brings a natural sweetness that blends into the smooth, chilled base. The vanilla wafers soften just enough to turn into little bites of cake, giving the dish a soft texture that contrasts with the fresh slices. Pull this out of the fridge when you want a cooling finish to a heavy meal.
Why You Will Love This Recipe
- Speedy Setup: You get this dessert ready in under fifteen minutes of actual work. The instant pudding mix does the heavy lifting, so you avoid the long wait of cooling down a stove-top custard.
- Classic Comfort: This dish taps into a sense of nostalgia that few other sweets can match. Each spoonful features a familiar mix of silky cream, soft fruit, and buttery cookies.
- Crowd Favorite: It feeds a large group without needing individual portions or complex plating. Everyone can scoop out exactly as much as they want for their own bowl.
- Texture Balance: The cookies lose their crunch to become tender, while the cold pudding provides a smooth base. You get a nice variety of mouthfeel that keeps the dessert interesting.
- No Oven Needed: You keep your kitchen cool because no heat is involved in the assembly. It stays light and refreshing, which is a major win during warmer months.
Ingredients
- Instant Vanilla Pudding Mix (5 oz box): This provides the structure and flavor for your entire base. Make sure you grab the instant kind, not the cook-and-serve variety, so it thickens up without needing a burner.
- Cold Whole Milk (3 cups): Whole milk gives you the right thickness and a full, milky flavor. If you use skim milk, the pudding ends up thin and might not set as firmly.
- Sweetened Condensed Milk (14 oz can): This adds a depth of sweetness and a velvety quality that makes the dessert feel indulgent. It pairs with the pudding mix to create a very smooth foundation.
- Whipped Topping (12 oz tub): Thaw this in the fridge before you start so it mixes in easily. It makes the final dish airy and light rather than dense.
- Vanilla Wafers (12 oz box): These act like little sponges for the pudding, softening as they soak. You want the classic golden wafers, not the bite-sized or mini versions, for the best structure.
- Ripe Bananas (5 medium): Look for fruit with just a few small brown spots on the skin. This means they are sweet and soft but still hold their shape when sliced.
✅ Also Read: Easy Homemade Banana Cream Pie Recipe with Meringue
Steps to Make Banana Pudding with Instant Pudding: Easy Guide
Mixing the Creamy Base
Grab a large bowl and pour in your cold milk and the pudding mix. Use a whisk to beat the two together for about two minutes. You want the mixture to look thick and uniform, so do not stop until you stop feeling resistance against the whisk.
Next, stir in the sweetened condensed milk. Use a rubber spatula to fold this in until the color is consistent throughout. This step makes your base look glossy and smell like rich vanilla.
Creating the Light Texture
Fold the thawed whipped topping into your pudding mixture. Do this gently with your spatula to keep the air inside. You are not trying to beat it, just combine the two textures until you see no more white streaks.
This mixture becomes light and fluffy once you finish the folding. It should feel like a cloud on your spatula when you lift it out of the bowl. If it looks flat, keep folding until you get that soft, airy look.
Building the Layers
Spread a thin layer of your pudding mix on the bottom of a 9×13 dish. This stops the first layer of cookies from sliding around when you start stacking. Arrange a row of vanilla wafers across the bottom to create a solid base.
Slice your bananas into coins about a quarter-inch thick. Place a generous layer of these over the wafers. Repeat these layers until you fill the dish, finishing with a final layer of pudding on top to cover everything.
Finishing the Dish
Crush a handful of leftover wafers in a bag and sprinkle them over the top. This gives the dessert a finished look and a bit of texture on the surface. Cover the dish with plastic wrap and slide it into the fridge.
Let the pudding sit for at least four hours before serving. This time allows the cookies to soak up the moisture from the pudding. You will know it is ready when the wafers feel soft all the way through like a light cake.
What to Serve with Banana Pudding with Instant Pudding
Fresh Berry Sides
Serve a small bowl of fresh strawberries or blueberries on the side. The tart juice from these berries cuts through the sweet, creamy pudding. It adds a pop of color and a refreshing brightness to your plate.
Hot Coffee Mugs
A cup of black coffee is the perfect partner for this dessert. The bitterness of the coffee balances the sugar in the pudding. It keeps your palate clean between every bite of the soft fruit.
Whipped Cream Dollops
Add a fresh dollop of real whipped cream on top of each serving. This adds a different type of airy lightness that differs from the folded-in topping. It makes the dish look fancy for guests.
Toasted Nut Garnish
Sprinkle a few chopped pecans or walnuts over the top of the dish. The crunch provides a nice break from the soft layers. It adds an earthy note that grounds the sweetness of the bananas.
Storage and Reheating
Keeping It Fresh
Keep the dish covered tightly with plastic wrap to stop the bananas from browning. It stays fresh in the fridge for up to three days. After that, the cookies get too soft and the bananas start to lose their texture.
Choosing the Container
Glass or ceramic dishes work best for storage. These materials stay cold in the fridge and keep the pudding at the right temperature. Avoid using metal pans, as they can change the flavor of the pudding over time.
Why Avoid Freezing
Do not put this dessert in the freezer. The pudding base separates once it thaws, and the bananas turn into mushy, icy bits. It ruins the smooth quality that makes this recipe work.
Signs of Aging
Look at the bananas if the dish has been sitting for more than two days. If they turn dark or slimy, it is time to throw the leftovers away. Freshness matters with fruit-based desserts.
What Makes This Recipe Special
The Texture Transformation
Most people love how the dry wafers turn into soft bites. This process creates a layered dessert that feels like a homemade trifle. You get a consistent texture throughout the entire pan.
The Balancing Act
Using both instant pudding and sweetened condensed milk is the secret. It prevents the pudding from being too stiff or overly sugary. You get a perfect middle ground that feels luxurious yet light.
The Visual Appeal
The alternating layers look beautiful when you scoop the dessert onto a plate. You see the distinct lines of yellow bananas, golden wafers, and white cream. It makes a simple snack feel like a planned party dessert.
The Minimal Effort
You do not need to worry about curdling eggs or watching a stove. This recipe allows you to focus on the assembly rather than the chemistry. It removes the stress of potentially burning your custard.
✅ See Also: Easy Homemade Betty Crocker Coconut Cream Pie
Pro Tips for the Best Results
Preventing Brown Bananas
Coat your banana slices in a tiny bit of lemon juice before adding them to the dish. This keeps them bright and fresh-looking for longer. It adds a faint zing that cuts the sweetness just a bit.
Thickening the Base
Make sure your milk is ice-cold when you start whisking the pudding. This helps the starch in the mix set up quickly. If your milk is warm, the pudding stays runny and won’t hold the layers.
Choosing the Right Wafers
Stick to the name-brand vanilla wafers for the best structure. Cheap store-brand cookies often get soggy way too fast. You want a cookie that keeps a little bit of its shape even after soaking.
Creating Even Layers
Use a measuring cup to scoop the pudding into the dish. This ensures every layer has the same amount of filling. Your final slice will look uniform and professional when you serve it.
Variations and Substitutions
Swapping the Fruit
Try using sliced strawberries instead of bananas for a different flavor. The tartness works well with the vanilla pudding. You could also mix both fruits for a colorful, summer-ready twist.
Adding Coconut
Sprinkle toasted coconut between the layers for a tropical edge. It adds a nice chew and pairs well with the creamy base. Make sure to toast the coconut in a dry pan first for more flavor.
Using Different Cookies
Replace vanilla wafers with graham crackers if you want a firmer bite. Break them into pieces to fit the corners of your dish. It gives the dessert a flavor profile similar to a banana cream pie.
Spicing the Cream
Add a teaspoon of cinnamon to the pudding mixture before folding in the whipped topping. This warm spice complements the bananas perfectly. It makes the dish feel cozy and perfect for cooler evenings.
Frequently Asked Questions
Can I Make This Dessert the Night Before?
Yes, you can assemble this the night before and keep it in the fridge. The cookies will get very soft, which some people prefer. Just make sure to cover it tightly so the top layer does not dry out.
Is It Possible to Use Sugar-free Pudding Mix?
You can use sugar-free instant pudding mix without changing the steps. The texture stays mostly the same, but the overall sweetness level drops significantly. It is a good option if you want to lower the sugar content.
Are There Dairy-free Alternatives for the Milk?
You can use almond or soy milk, but the pudding might not set as firmly. Look for a plant-based milk that is labeled as extra creamy. This helps the pudding hold its shape between the layers.
Do I Need to Use a Hand Mixer?
You do not need a mixer at all for this recipe. A simple wire whisk works perfectly for the pudding and milk. Using a spoon or spatula to fold in the topping keeps the air inside.
Can I Add Nuts to the Layers?
You can add finely chopped nuts between the layers if you want an extra crunch. Toasted pecans or macadamia nuts work especially well with the banana. Avoid large chunks, as they make it harder to scoop clean portions.
Does This Dessert Need to Be Served Chilled?
This dish must be served chilled to taste its best. The pudding needs time in the fridge to set and reach the right temperature. Serving it warm makes the texture feel loose and less refreshing.
Are There Ways to Make It Look Fancier?
You can pipe whipped cream around the edges of the dish before serving. Shaving a little bit of white chocolate over the top also adds a nice touch. These small steps make the simple dessert look like a bakery creation.
Final Thoughts
This simple dessert proves that you do not need complicated steps to create something everyone enjoys. The mix of soft bananas and tender wafers is a winner every single time. Keep this recipe handy for your next get-together or whenever you crave a sweet, cold treat.

Banana Pudding With Instant Pudding
Ingredients
- 5 oz instant vanilla pudding mix
- 3 cups cold whole milk
- 14 oz sweetened condensed milk
- 12 oz whipped topping
- 12 oz vanilla wafers
- 5 medium bananas
Tools You Need
- Large mixing bowl
- Wire whisk
- Rubber spatula
- 9×13 glass dish
- Knife
- Cutting board
Steps
- Whisk the pudding mix and cold milk together for two minutes until thick.
- Stir in the sweetened condensed milk until the base is smooth and glossy.
- Fold in the whipped topping gently to keep the mixture light and airy.
- Spread a thin layer of pudding on the bottom of the dish to secure the wafers.
- Arrange a layer of vanilla wafers across the pudding base.
- Add a layer of banana slices over the cookies.
- Repeat the pudding, wafer, and banana layers until the dish is full.
- Crush a few extra wafers to sprinkle over the top for garnish.
- Chill in the fridge for at least four hours before serving.