
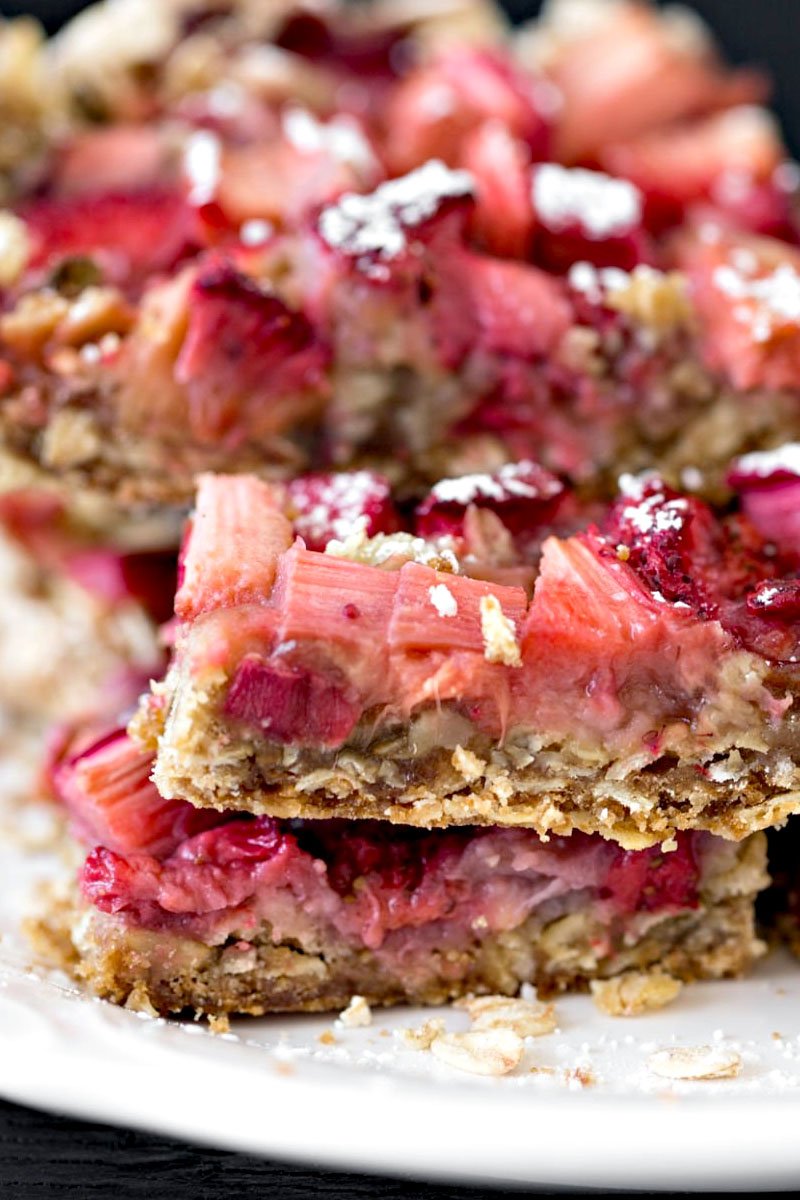
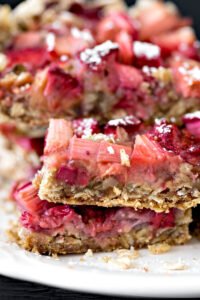
Homemade rhubarb bars with oats bring tart flavor and buttery crust to your kitchen table.
Rhubarb season shows up fast in the spring, and backyard patches overflow with bright pink stalks before anyone notices. Folks usually rush to make big fruit pies, but pastry crust takes time, and busy afternoons call for something much faster. That is where a pan of baked squares comes in handy, saving you from rolling dough while still using up all that tart garden fruit. You get a chewy oat base, a sweet jammy fruit layer, and a crumbly top, all in one easy bake.
Brown sugar balances the sour garden stalks, while rolled oats give every square a hearty chew. Real butter holds the oat crust together, turning golden and rich as it bakes in a hot oven. A warm batch fills your kitchen with a cozy baked scent, making everyone wander into the room. Grab a knife, cut a square, and see how fast this dessert disappears off the counter.
Why You Will Love This Recipe
- Pantry Friendly: Basic baking staples build the crust and topping, so you do not need a special grocery trip. Flour, oats, sugar, and butter sit in most kitchens already, waiting for a weekend baking project.
- Tart and Sweet Balance: Fresh rhubarb brings a natural pucker, but brown sugar and sweet fruit chunks calm the tang right down. That contrast keeps your taste buds happy, stopping the bars from tasting too sugary.
- Chewy and Crumbly Texture: Rolled oats add a hearty bite, while the buttery crumb topping bakes up crisp. You get two different textures in every single square, keeping snack time fun.
- Great for Sharing: One baking pan yields plenty of squares for potlucks, bake sales, or weekend family visits. People always ask for the recipe after one bite, so keep a copy handy.
- No Special Tools Needed: A mixing bowl, a wooden spoon, and a standard baking pan get the job done. You skip the electric mixer completely, meaning less cleanup waiting in the sink.
Ingredients
- Rolled Oats (2 cups): Hearty whole oats give the crust and topping their chew. Quick oats work in a pinch, but old-fashioned rolled oats hold their shape and bake up with better texture.
- All-Purpose Flour (1 and 1/2 cups): Binds the dry ingredients together so your bars do not crumble apart. Spoon the flour into your measuring cup rather than scooping, keeping the crust light instead of heavy.
- Brown Sugar (1 cup): Adds deep caramel sweetness and moisture to the oat mixture. Dark brown sugar gives a richer molasses flavor, while light brown sugar keeps things mild.
- Cold Butter (1 cup): Cut into small cubes so it rubs into the dry mix easily. Cold butter creates pockets of steam in the oven, making the crumb topping flaky and tender.
- Fresh Rhubarb (3 cups): Chopped into small pieces to cook down into a tart fruit layer. Look for firm, crisp stalks with bright color, leaving limp or bruised pieces at the store.
- Granulated Sugar (1/2 cup): Sweetens the tart fruit layer as it simmers on the stove. This sugar draws out the juices, turning the raw stalks into a thick, glossy jam.
- Cornstarch (2 tablespoons): Thickens the runny fruit juices so your bars stay neat when sliced. Whisk it smoothly into the cold fruit mix before heating, avoiding any lumpy spots in your filling.
Steps to Make Amish Oatmeal Rhubarb Bars Recipe: Step-by-step Easy Guide
Simmering the Fruit Filling
Fresh rhubarb needs a quick stove bath to soften up before hitting the oven. Chop those pink stalks into small pieces, tossing them into a saucepan with white sugar and cornstarch. Turn the burner to medium heat, stirring the pink mix as it warms up. Watch the pan closely until juicy bubbles pop on the surface, and the fruit turns soft and jammy. Pull the pot off the burner, setting it aside to cool down while you work on the crust.
Mixing the Oat Base
Grab a large mixing bowl, dumping in your rolled oats, flour, and brown sugar. Toss those dry items together with a fork, making sure no brown sugar lumps hide at the bottom. Drop your cold butter cubes right into the bowl, using your clean fingers to pinch the butter into the flour. Keep rubbing until the mixture looks like coarse sand with a few pea-sized butter bits left over. This method guarantees a crumbly, rich crust that holds together without turning into bread.
Pressing the Crust Layer
Line your baking pan with parchment paper, leaving a little overhang on the sides for easy lifting later. Pour half of your oat mixture into the bottom of the pan, spreading it out evenly with your hands. Press down firmly on the crumbs, packing the base tight so your bars do not fall apart when cut. A flat measuring cup bottom works wonders here, smoothing out the surface in just a few seconds.
Baking Until Golden Brown
Pour that cooled fruit filling right over your pressed oat base, spreading it out to the edges with a spatula. Sprinkle the remaining oat crumble evenly across the top, letting bits of pink fruit peek through the gaps. Slide the pan into a hot oven, baking until the top turns a deep golden brown and the edges bubble. Pull the pan out to cool completely on the counter, letting the filling set before you slice into neat squares.
What to Serve with Amish Oatmeal Rhubarb Bars Recipe
Cold Milk Glasses
A tall glass of cold milk cuts right through the rich buttery oats. The creamy drink cools your mouth down, making every sweet and tart bite taste even better. Kids love this classic pairing after school, turning a simple snack into a real treat.
Vanilla Bean Ice Cream
A warm square topped with melting ice cream creates an instant dessert masterpiece. Cold vanilla scoops slide into the crumbly topping, soaking up the leftover fruit juices. You get a nice contrast of temperatures, making the whole plate feel a bit fancy.
Hot Afternoon Coffee
Brew a fresh pot of dark roast coffee to sip alongside your afternoon snack. The bitter coffee notes balance the brown sugar sweetness in the crust. It gives you a nice pause in the middle of a busy workday.
Fresh Whipped Cream
Dollop a spoonful of unsweetened whipped cream right on top of each cooled square. The airy cream adds lightness, softening the hearty oat texture beneath it. It looks pretty on the plate, too, when guests come over.
Storage and Reheating
Countertop Storage Container
Keep your leftover bars in an airtight container right on the kitchen counter for up to two days. A sheet of paper towel placed inside absorbs extra moisture, keeping the oat crust from turning soggy. Make sure the lid seals tightly, protecting the baked treats from pantry air.
Refrigerator Shelf Life
Slide your container into the refrigerator if you plan to keep the bars for nearly a week. The cool air keeps the fruit filling fresh, though the oat crust loses a bit of its initial crispness. Let a chilled square sit on the counter for ten minutes before eating, bringing back the buttery flavor.
Freezing Baked Squares
Wrap individual bars tightly in plastic wrap, then stack them inside a sturdy freezer bag. They stay fresh for up to three months, waiting patiently for a sudden craving. Thaw a single square overnight in the fridge, or pop an unwrapped piece straight into the microwave for twenty seconds.
Quick Microwave Warming
Zap a single square on a microwave-safe plate for fifteen seconds if you want that fresh-baked warmth back. The butter in the crust softens right up, and the fruit filling turns gooey again. Do not overheat the square, or the oats might turn chewy in a bad way.
What Makes This Recipe Special
Old Fashioned Roots
Traditional farm kitchen baking inspires these simple squares, skipping fancy pastry techniques entirely. Generations of home cooks relied on garden harvests to feed hungry families with minimal fuss. That history shows up in every bite, tasting like something your grandmother pulled from her oven.
Jammy Fruit Center
Cooking the stalks first guarantees a thick fruit layer that never leaks or runs all over the pan. Raw fruit releases too much water during baking, but pre-cooking concentrates that bright garden flavor. You get a rich, spoonable jam layer tucked neatly between two oat layers.
Double Duty Mixture
Using the exact same oat mix for both the crust and the topping saves you extra mixing bowls. You just scoop out half the batch for the bottom, leaving the rest for the top layer. That clever kitchen shortcut cuts your prep time in half, keeping dishwashing to a minimum.
Perfect Contrast
Every square delivers a mix of textures, from the chewy oat base to the tender fruit center. The buttery crumble on top adds a slight crunch, keeping your mouth interested from the first bite to the last crumb. It is that texture combo that makes people reach for a second square without thinking.
Pro Tips for the Best Results
Keep the Butter Cold
Dice your butter and pop it back in the fridge until the very second you need it to mix. Warm butter melts too fast in your hands, turning the dry mix into a sticky paste instead of a crumbly topping. Cold butter creates those flaky, tender pockets in the oven that make the crust taste amazing.
Do Not Skip Parchment
Line your baking pan with parchment paper, leaving overhang on two sides so you can lift the whole block out. Trying to dig the first bar out of a metal pan usually ruins the shape, leaving you with a messy pile of crumbs. Lift the cooled block onto a cutting board, and your knife cuts clean, sharp squares every time.
Let Them Cool Completely
Resist the urge to slice these bars while the pan is still warm from the oven. The fruit filling needs time to firm up as it cools, otherwise the layers slide right apart. Give the pan an hour on the counter, and your squares will hold their neat shape on the plate.
Chop Rhubarb Uniformly
Slice your garden stalks into equal quarter-inch pieces so they soften at the same rate on the stove. Big chunks stay crunchy while small bits turn to mush, messing up the texture of your fruit filling. Uniform pieces cook into a smooth, even jam that spreads easily over the crust.
Variations and Substitutions
Berry Swap In
Instead of all rhubarb, use half strawberries because the sweet berries tone down the tart garden fruit. Your filling turns a deeper red color, and the flavor tastes sweeter without adding extra sugar to the pot. The total fruit amount stays the same, so the baking time does not change at all.
Nutty Crunch Upgrade
Instead of plain oats, use chopped pecans in the topping because they add a rich, earthy crunch. Toss half a cup of nuts into the leftover crumble mixture before scattering it over the fruit. The roasted nuts taste fantastic with the brown sugar crust.
Gluten Free Option
Instead of regular flour, use a one-to-one gluten-free baking blend because it keeps the structure without wheat. Make sure your rolled oats carry a certified gluten-free label, too, keeping sensitive eaters safe. The baking time stays identical, though you should let the bars cool a bit longer before slicing.
Citrus Zest Twist
Instead of plain fruit, add fresh orange zest to the simmering filling because bright citrus wakes up the flavor. Grate one tablespoon of orange peel right into the pot as the rhubarb cooks down. That tiny extra step gives your baked squares a bright, summery background note.
Frequently Asked Questions
Can I Make This Ahead of Time?
Bake these bars a day before your event, storing them right in their pan on the counter with a lid. The flavors actually settle and taste better on day two, making your schedule much easier. Slice them just before serving, and nobody will ever guess you baked them yesterday.
Is This Recipe Freezer-friendly?
Wrap individual baked squares tightly in plastic wrap before tossing them into a large freezer bag for later. They hold their texture well for up to three months, making them great for meal prep snacks. Thaw them on the counter for an hour, and they taste just as good as fresh.
Are There Any Dairy-free Options?
Swap the dairy butter for your favorite plant-based baking sticks, keeping the exact same measurement. The oat crust and crumble topping turn out just as rich and golden in the hot oven. Plant-based butter behaves very like dairy fat here, so your results stay consistent.
Do I Need a Special Pan for This?
An eight-inch by eight-inch metal baking pan works best for thick, tall bars in this recipe. Glass dishes work too, though you might need to add five extra minutes to your baking time since glass heats up slower. Avoid using oversized pans, or your bars will turn out too thin and dry.
Does This Work with Frozen Rhubarb?
Thaw your frozen stalks completely in a colander, pressing out all the extra liquid with a paper towel before cooking. Frozen fruit holds a lot of water, which makes the filling runny if you skip the draining step. Toss in an extra teaspoon of cornstarch just to be safe, keeping your jam thick.
Can I Cut Down the Sugar?
Reduce the white sugar in the fruit filling slightly if you love a very tart, puckery bite. Keep the brown sugar amount in the crust the same, since fat and sugar work together to hold the oats together. Cutting the sugar too much might make the crust fall apart, so make small changes.
Do I Have to Peel the Stalks?
Young spring rhubarb stalks have thin, tender skin that melts right down as it simmers on the stove. Leave the peel on to keep that bright pink color in your finished fruit filling and save yourself extra work. Only peel older, woody stalks that look stringy and tough on the outside.
Final Thoughts
Baking a pan of these oat bars brings simple comfort right back to your kitchen counter. You get sweet fruit, chewy oats, and buttery crust without spending hours standing by the stove. Grab a fresh stalk of rhubarb today, and enjoy every single bite of this homemade treat.
Amish Oatmeal Rhubarb Bars Recipe
Ingredients
- Rolled Oats (2 cups)
- All-Purpose Flour (1 and 1/2 cups)
- Brown Sugar (1 cup)
- Cold Butter (1 cup)
- Fresh Rhubarb (3 cups)
- Granulated Sugar (1/2 cup)
- Cornstarch (2 tablespoons)
Tools You Need
- Mixing bowl
- Saucepan
- 8×8 baking pan
- Parchment paper
- Measuring cups
Steps
- Chop the rhubarb stalks into small pieces and place them in a saucepan with granulated sugar and cornstarch.
- Simmer the fruit mixture over medium heat until it bubbles and turns thick and jammy.
- Mix the rolled oats, flour, and brown sugar together in a large bowl.
- Rub the cold butter into the dry oat mixture until it resembles coarse sand.
- Press half of the oat mixture firmly into the bottom of a parchment-lined baking pan.
- Pour the cooled fruit filling evenly over the pressed oat base.
- Scatter the remaining oat crumble across the top of the fruit layer.
- Bake in a hot oven until the top turns golden brown and the edges bubble.