
A perfectly seasoned, juicy chicken breast piled high on a toasted bun with your favorite toppings. This is the chicken sandwich you've been dreaming of, made right in your own kitchen.
You know that feeling. The one where only a really good chicken sandwich will do. Not just any sandwich, but one with chicken that's tender on the inside and has just the right crispness on the outside. It needs balance. It needs flavor.
This recipe delivers exactly that. We focus on simple steps that build incredible taste and texture. You'll end up with a sandwich that's satisfying, surprisingly easy to make, and totally worth the small effort.
Why You Will Love This Recipe
- Ready in under 45 minutes.
- Achieves juicy chicken with a perfect crust.
- Easily customizable to your taste.
- Uses common pantry ingredients.
- Impresses like a restaurant favorite.
- Great for quick lunches or dinners.
Ingredients
For the Chicken
- 2 boneless, skinless chicken breasts (about 6-8 oz each)
- 1/2 cup all-purpose flour
- 1 teaspoon paprika
- 1 teaspoon garlic powder
- 1/2 teaspoon onion powder
- 1/2 teaspoon salt
- 1/4 teaspoon black pepper
- 2 large eggs
- 1 tablespoon milk or water
- 1 cup panko breadcrumbs
- 1/4 cup grated Parmesan cheese (optional)
- 4 tablespoons vegetable oil or other neutral oil, for frying
For Assembly
- 4 brioche buns or your favorite sandwich rolls
- 4 tablespoons mayonnaise or aioli
- Lettuce leaves
- Tomato slices
- Pickle slices
- Optional: melted cheddar cheese, hot sauce
✅ Also Read: Quick Ramen Noodles with Boiled Eggs and Sausage
How to Make Sandwich with Chicken — Step by Step
Preparing the Chicken Breasts
Start by getting your chicken ready. If your chicken breasts are very thick, you might want to pound them down slightly. This helps them cook evenly. You can do this by placing the chicken between two pieces of plastic wrap or in a zip-top bag and gently hitting it with a rolling pin or a heavy pan. Aim for about 3/4-inch thickness. This ensures you don’t end up with dry chicken on the edges while the center is still raw.
Once pounded, cut each breast in half horizontally to make thinner cutlets. This further helps with even cooking and makes them fit better on your buns. Season both sides of the chicken pieces generously with salt and pepper. Don’t be shy here; this is your first layer of flavor.
Setting Up the Breading Station
Now, let’s get your breading station ready. You’ll need three shallow dishes or plates. In the first dish, whisk together the flour, paprika, garlic powder, onion powder, salt, and pepper. This seasoned flour will give your chicken a flavorful base.
In the second dish, whisk the eggs with the milk or water until well combined. This liquid mixture helps the breadcrumbs stick to the chicken. In the third dish, combine the panko breadcrumbs and the grated Parmesan cheese, if you’re using it. Panko gives you that amazing crispy texture that's lighter than regular breadcrumbs.
Breading the Chicken Cutlets
Take each seasoned chicken cutlet and dredge it in the flour mixture, making sure it’s fully coated. Shake off any excess flour. Then, dip it into the egg wash, letting any extra drip off. Finally, press the chicken into the panko-Parmesan mixture, coating both sides evenly. Ensure the breadcrumbs adhere well. You can gently pat them on if needed. This triple-coating is key to that delicious, crispy exterior.
Frying the Chicken for Perfection
Heat the vegetable oil in a large skillet over medium-high heat. You want the oil to be hot enough that when you drop a breadcrumb in, it sizzles immediately. This usually takes about 3-5 minutes. Carefully place the breaded chicken cutlets into the hot oil, making sure not to overcrowd the pan. Fry in batches if necessary.
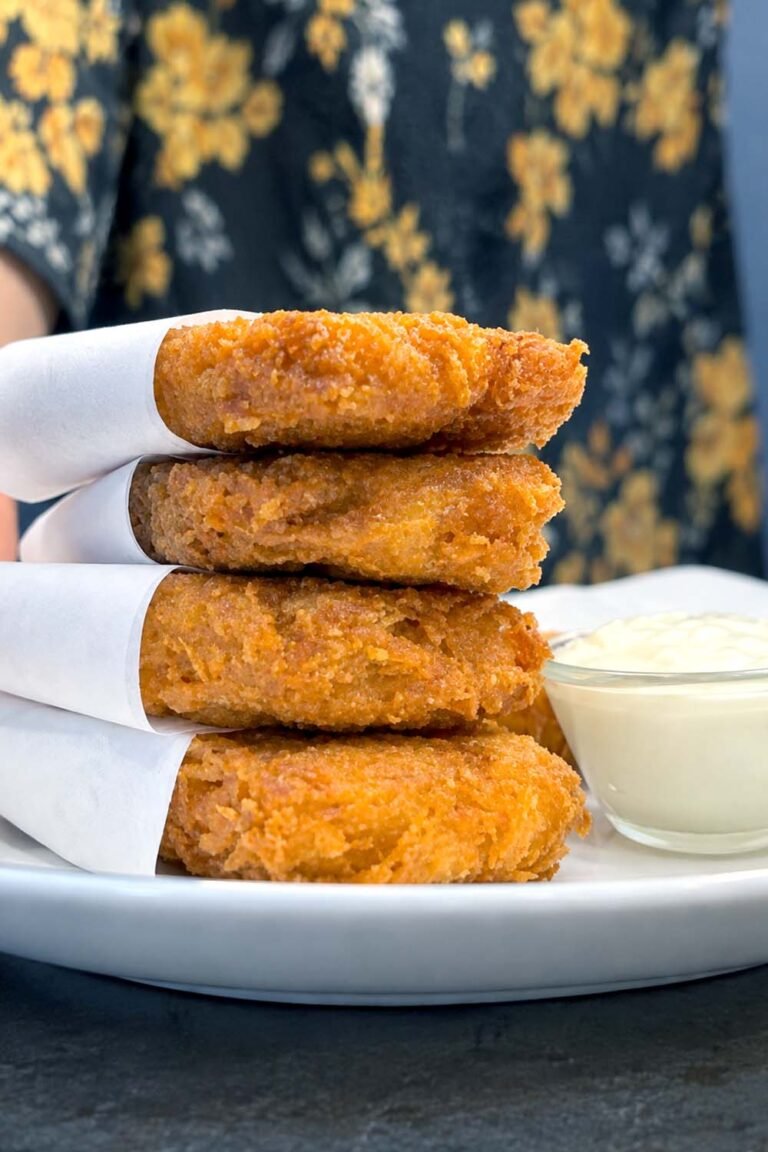
Cook the chicken for about 3-4 minutes per side, or until it's golden brown and cooked through. You’ll see the edges turn a beautiful deep golden color. The internal temperature should reach 165°F (74°C) on an instant-read thermometer. Remove the cooked chicken from the skillet and place it on a wire rack set over a baking sheet. This allows excess oil to drain and keeps the crust from getting soggy.
Assembling Your Masterpiece
Lightly toast your brioche buns. You can do this in the same skillet (after wiping it clean), in a toaster, or under the broiler for a minute. A toasted bun adds a nice texture contrast and holds up better to the fillings. Spread a generous amount of mayonnaise or aioli on the bottom half of each bun. Place a piece of crispy chicken on top of the spread.
Add your desired toppings. Start with lettuce leaves for freshness, then tomato slices, and finally pickle slices for that tangy crunch. If you like cheese, now is the time to add a slice and let the residual heat melt it slightly. Add a dash of hot sauce if you're feeling adventurous. Place the top half of the bun on, and your incredible sandwich is ready.
What to Serve with Sandwich with Chicken
Crunchy Potato Sides
For a classic pairing, you can’t go wrong with crispy french fries or seasoned potato wedges. They complement the chicken's texture and are always a crowd-pleaser. Make sure they're hot and seasoned well to match the sandwich.
Fresh and Zesty Slaws
A creamy coleslaw or a vinegary vinegar-based slaw offers a bright, refreshing contrast to the rich, fried chicken. The acidity cuts through the richness of the sandwich, making each bite balanced and exciting.
Simple Green Salads
If you want something lighter, a simple side salad with a vinaigrette dressing works wonders. Think mixed greens, cherry tomatoes, and cucumber. It adds a touch of freshness without being too heavy.
Quick Pickled Vegetables
Besides pickles on the sandwich, a small side of quick-pickled carrots, onions, or radishes can add another layer of bright, tangy flavor. They’re easy to whip up and offer a nice textural crunch.
✅ See Also: Easy Grilled Cheese Sandwich for Quick Breakfast
Storage and Reheating
Keeping Leftovers Fresh
If you happen to have any leftover chicken, store it separately from the bun and toppings. The crispy coating is best when fresh, so keeping it separate helps maintain some of that crunch. Wrap the chicken tightly in foil or place it in an airtight container.
Reheating for Best Texture
To reheat the chicken, the oven or an air fryer is your best bet for preserving crispiness. Place the chicken on a baking sheet in a preheated oven at 375°F (190°C) for about 5-8 minutes, or until heated through. In an air fryer, cook at 350°F (175°C) for about 4-6 minutes, flipping halfway. Microwaving will make the coating soggy.
Storing Assembled Sandwiches
Assembled sandwiches don’t store well. The bun will get soggy, and the chicken will lose its crispness. It's always best to assemble your sandwich right before you plan to eat it. If you must store it, keep the components separate and assemble just before serving.
Daily Freshness is Ideal
This chicken sandwich truly shines when eaten fresh. The combination of hot, crispy chicken and a soft, toasted bun is unparalleled. While leftovers are possible, they won’t quite replicate that initial perfect bite.
What Makes This Recipe Special
Perfectly Crispy Coating
The use of panko breadcrumbs, combined with a double dredge through flour and egg, creates an exceptionally crispy and light coating. This isn’t your average fried chicken texture; it’s airy and crunchy, providing a delightful contrast to the tender chicken inside.
Juicy, Tender Chicken
Pounding the chicken to an even thickness ensures it cooks quickly and evenly. This prevents the outside from drying out before the inside is cooked, resulting in wonderfully moist and tender chicken breast every time.
Flavorful Seasoning Blend
The simple blend of paprika, garlic powder, and onion powder provides a savory depth that enhances the natural flavor of the chicken. It’s not overpowering, but it adds that essential “something extra” that makes you go back for another bite.
The Brioche Bun Factor
Using a brioche bun is a small detail that makes a big difference. Its slightly sweet, rich flavor and soft texture beautifully complement the savory chicken, elevating the entire sandwich experience beyond a standard roll.
Pro Tips for the Best Results
Double Dredge for Extra Crisp
For an even crunchier crust, consider a double dredge. After the first breadcrumb coating, dip the chicken back into the egg wash, then into the breadcrumbs again. This builds up a thicker, more robust coating that stays crispy longer. It’s extra work, but the texture is amazing.
Don’t Overcrowd the Pan
When frying, give the chicken pieces space. If you put too many cutlets in the pan at once, the oil temperature will drop significantly. This causes the chicken to absorb more oil and become greasy instead of crispy. Fry in batches if needed.
Use a Thermometer for Safety
An instant-read thermometer is your best friend for perfectly cooked chicken. Insert it into the thickest part of the chicken cutlet. You're looking for 165°F (74°C). This ensures the chicken is safe to eat and not undercooked, while also preventing overcooking.
Toast Your Buns Well
Don’t skip toasting the buns. A light toasting on the cut sides prevents them from becoming soggy from the chicken juices and condiments. It also adds a pleasant texture and a slightly nutty flavor to the overall sandwich.
Variations and Substitutions
Spice It Up with Hot Sauce
For a spicier kick, add a pinch of cayenne pepper or red pepper flakes to the flour mixture or the panko. You can also drizzle your favorite hot sauce over the chicken before adding the top bun, or mix some into your mayonnaise for a spicy aioli.
Gluten-free Option
To make this gluten-free, simply swap the all-purpose flour for a gluten-free all-purpose blend. For the breadcrumbs, use gluten-free panko or finely crushed gluten-free crackers. Ensure all your other ingredients are also certified gluten-free.
Different Buns or Bread
If brioche buns aren’t your favorite, feel free to use potato rolls, Kaiser rolls, or even sturdy sourdough bread slices. The key is a bun that can hold up to the chicken and toppings without falling apart. A toasted ciabatta roll also works well.
Add Crispy Bacon
Crispy cooked bacon is a fantastic addition to any chicken sandwich. Layer a few strips of bacon on top of the chicken before adding your lettuce and tomato. The salty, smoky flavor of bacon pairs wonderfully with the fried chicken.
Frequently Asked Questions
Can I Bake the Chicken Instead of Frying?
You can bake the chicken, but it won’t achieve the same level of crispiness as frying. For baking, preheat your oven to 400°F (200°C). Place the breaded chicken on a wire rack set over a baking sheet and bake for 20-25 minutes, flipping halfway, until cooked through and golden.
Is This Recipe Freezer-friendly?
The fried chicken itself can be frozen after cooking and cooling. Wrap individual pieces tightly in plastic wrap, then in foil, or place them in a freezer-safe bag. Reheat them using the oven or air fryer method to restore crispiness. It’s best not to freeze assembled sandwiches.
Are There Any Dairy-free Options?
Yes, you can make this dairy-free by omitting the Parmesan cheese from the breadcrumbs. Ensure your bun choice is dairy-free as well, as some brioche buns contain milk. Use a dairy-free mayonnaise or aioli for assembly.
Do I Need to Pound the Chicken?
Pounding the chicken ensures even thickness, which leads to more consistent cooking. If your chicken breasts are already relatively thin and uniform, you might be able to skip this step, but it's recommended for the best results.
Does This Work with Chicken Thighs?
Boneless, skinless chicken thighs are a great alternative. They tend to stay moister than breasts. Pound them to an even thickness, then follow the same breading and frying steps. Adjust the cooking time slightly as thighs can cook faster.
Can I Make the Breaded Chicken Ahead of Time?
You can bread the chicken a few hours in advance and keep it chilled in the refrigerator on a parchment-lined baking sheet. However, it's best to fry it as close to serving time as possible for maximum crispiness. Do not leave it breaded for too long, as the coating can become gummy.
What’s the Best Way to Cut the Chicken?
Cutting the chicken breasts horizontally into thinner cutlets before breading helps ensure they cook quickly and evenly. This also makes them a more manageable size for a sandwich bun and prevents dry edges.
Final Thoughts
This chicken sandwich proves that fantastic flavor and texture are absolutely achievable at home. You've got juicy, crispy chicken and all the fixings for a truly satisfying meal. Now go ahead and build yours – you deserve it!